Monday, May 9, 2011

Mediterranean Pizza and Pizza dough recipe!

This is one of my favorite things to make and oh so yummy.......Mediterranean Pizza using a homemade pizza dough recipe....hope you enjoy it as much as we do :)

Here's a bunch of the stuff you need :)  (In case your wondering that is the sun streaming in and making me happy as I worked on dinner!!!)

Okay we will start with the pizza dough recipe....this is the one my mom always made when we were growing up so it has lots of happy memories for me.  I love the smell of yeast breads!!!!!  The recipe is taken from the Waunakee cookbook....

Pizza Dough
1 pkg of yeast  in 1/2 cup warm water ( I used 2 tsp. of breadmachine yeast that I keep in the fridge...Red Star I think)
Add 1 Tablespoon of sugar to the yeast and water and set aside

In bowl add:
1 3/4 cup flour (can do 1/2 wheat if you like)
1/4 cup warm milk
Melt 1 Tablespoon shortening in milk....I use butter...not big on crisco sorry!
1 egg
1/2 tsp salt

Mix ingredients together and then add yeast mixture.  Knead with fork.
This week I also added parm cheese (1/3 cup approx.) some garlic powder and Mrs. Dash - basil and tomato seasoning....sometimes I add fresh chopped basil.

Make into ball and but on a pizza stone that has been lightly greased and sprinkled with corn meal (optional)


You might need to add a little flour to the mixture if the dough is too sticky....just don't add to much.  Stretch your dough out and make a nice crust.  We like crust :)  You can see the corn meal on the crust and the herbs in the dough :)


The next step is to lightly drizzle olive oil over the dough.   This is a non-pizza sauce pizza.  However, this dough works great with traditional pizza recipes also.  Normally I would put spinach next but I didn't have any so I skipped that step :)  We would get our greens from the salads I was making.   Next sprinkle your dough with Mozzarella cheese and parm. cheese.....


Looking good.... ummmm you might want to wipe that drool were not done yet!!!

Now you get to add all the yummy toppings....again this is my version of Mediterranean pizza so that is my theme here.  I added green onion (on 1/2...for me :) ) Sun dried tomato, grilled chicken, red pepper and feta cheese...yes we love feta...okay we love CHEESE!!!! 

Bake at 350 for 20-30 minutes (depends on how done you like your crust)
Serve with a nice salad and you have a yummy dinner!!!
(flowers are from our yard...tulips and daffies....I love the bright yellow...they make me happy!!!)

Drop me a comment and let me know if you try it :)
I would love to know what your favorite family pizza is!
Blessings ~ Linda

Sunday, May 8, 2011

Plastic Chair Redo

I was really excited when I was at Wal-Mart a few weeks ago and found a spray paint made specially for plastic ~ Krylon Fusion for Plastic. I have some comfortable but older plastic chairs that go with our outdoor table.  Our table sits out on the deck under a HUGE maple tree.  These chairs have gotten stained over the years from leaves and other things but are still in really good shape.  I thought this would be a perfect solution to try so I bought it. 

 Yesterday was the perfect day here in Wisconsin :)  It was finally in the 60's and just so nice to be outside.  I thought it would be a great day to redo these chairs.  So I hauled them up from the basement and wiped them all down with soap and water to get them ready to paint.

The above photo is before..... and the bottom is after......

It's hard to tell the difference.  I really liked how this paint covered the chairs and refreshed them.  They look almost brand new again.  The paint puts a more grainy finish on the chairs but again I really liked how they look now.  The paint dries in 15 minutes which was nice. 

The bad part of this paint.....1 can did 2 chairs (barely)  I only put one coat on each of the 2 chairs.  The paint came out drippy to start and then started to spray covering over the drip marks.  I actually had 2 cans but the first can dripped all over one of the chairs then stopped working.  It is totally defective.  I am thinking because of the grainy finish it easily clogs up the opening.  Something to be aware of it you use this paint.  That part was disappointing since I wanted to finish this project yesterday.  But thankfully it doesn't take long to paint so I hopefully can swap out the defective can this week and finish up the job so we can enjoy warm nights on the back deck :)

Next up.....the Mediterranean  Pizza I made for dinner last night.....YUMMY!!!!!


Wednesday, May 4, 2011

Jeans...the most versatile clothing you own :)

So what do you do with those jeans that are worn out and no longer wearable because of a hole or you just don't like them.....

Well I actually have many uses for old jeans and will share some of them with you as we go along.  Today I thought I would actually share a really fun project I did a while ago.

My husband had a pair of worn out jeans....and I mean worn out so I deceided to cut off the legs and make them into holders.  Holders you ask?!  Yes, a holder.... one leg became a holder of rags...you know old socks and t-shirts that make great rags for cleaning and little projects.  And the other became a holder for plastic garbage bags. 

I can't figure out how to flip the photo so it's not sideways....sorry!!!  

As you can see I labeled each leg with fun material.  It is actually a bed sheet I have been using for different projects....a sheet from the 70's....flower power!  Nice bright colors :)  All I did was sew up the bottom of the leg.  Ironed the fun material to iron on backing, cut out the letters and circles with a pinking sheers...ironed them on to the leg.  Grabbed a handle...made out of a garage sale find...it is stuff you use to make roman shades....I don't even know the technical term :)  For the cat leg I actually added a ribbon as part of the handle.... you can see it if you look close.  I had two really easy bags that are very handy!  The cat bag is hanging downstairs next to the litter box....guess what the plastic bags are used for!  And the rag bag is hanging in the stairwell that goes down to the basement.  Good location for both items!!!!!


P.S. Do you like my beachy porch?!  I just love sitting out there with the cats and have the sun stream in.....
Have a blessed day :)
Linda

Saturday, April 23, 2011

Easter - Jelly Beans - Salvation

Here is something fun I am doing with my class tomorrow at Church for Ressurection Sunday....

Jelly Bean Joy

Jelly beans come in all the right colors to tell the gospel of God's love. Use this Jelly Bean Gospel Poem with any of the ideas below:
Purple is for the sins we've done,
Red is for the blood of God's only son,
White is for the grace he gives,
Green is for new life in him,
Yellow is for your place in heaven,
Invite Jesus into your life and be truly forgiven.

Dear Jesus, thank you for loving me even though I've sinned. Thank you for dying on the cross in my place. I'm sorry for my sins and want you to be my Lord and Savior today. Amen
Our snack is cup cakes with the jelly beans for decoration....I used Christmas liners...we can talk about that's when God's plan for redemption started....Jesus came to earth as a baby and then we can talk about the jelly bean joy found above.  Easter isn't about the rabbit it's all about JESUS :)

Have a blessed celebration remembering how much He Loves You!!!!!

Sunday, April 10, 2011

Picture Frame Redo.....Trash to Treasure!

Well I learned quite a bit on this project.......


It is fun to take apart an old frame with an ugly picture (see above) and spray paint a beautiful robins egg blue ......  (The cookie sheet is for another project I will share at a later time.....)


I tried and succeed distressing that same frame.....


I found out that a staple gun can be way to powerful and not your friend..... (I had to remove staples originally so I thought I would just staple the back on again....wrong!!!!!!! The staple gun I had went right through the glass and the frame!  Broken glass.....panic.....birthday party in a few hours.....now what?!!!!)

I found out that True Value will cut glass to size when you break the glass from the frame your redoing......(thankful Mr. W came home and clued me in before I went chasing all over town looking for another frame!!!!)

I also learned that the finished product was worth it....I hope Janet thought so too!!!  Happy 70th Janet!!!!


(Don't judge me.... I'm still new to this so don't know how to link :)....lol )

I think it looked MUCH better in person.  The white background is cardstock that shimmered....very pretty!!!!)  The frame and the background of the print looked beautiful together! 

So that is my latest adventure!!!!!  Enjoy.....

Saturday, April 2, 2011

I'll make my own flowers...... well how about a cake plate with flowers?

I don't know about you but I am sooooo ready for spring.....for warm weather....for flowers :) 
So I deceided to work on a project I have been wanting to try.  A cake plate made out of a candle stick and a plate.  It looked so cute when I ran across about a zillion bloggers who have done it...okay slight exageration... put it looked really cool and it was a cheap project.  I bought the plate with flowers and the candle stick at Goodwill for a $1.00 each piece.  I really liked this plate :)

The big thing is you want to have pieces that match so I bought cream spray paint so I could paint the candle stick after I cleaned it up.  It was looking dirty and gunky.  The really good news is after I cleaned it up it matched the color of the plate perfectly!!!  I was tickled :)  So then I had to remember where I put the Gorilla Glue I bought the week before for this project.  I hate it when I forget where I put things....hmmmm.....Jim said my monkeys took it!  Made sence to me :)  I blamed Rang right away!!!!  If you don't know who my Rang is I will introduce at another time. 
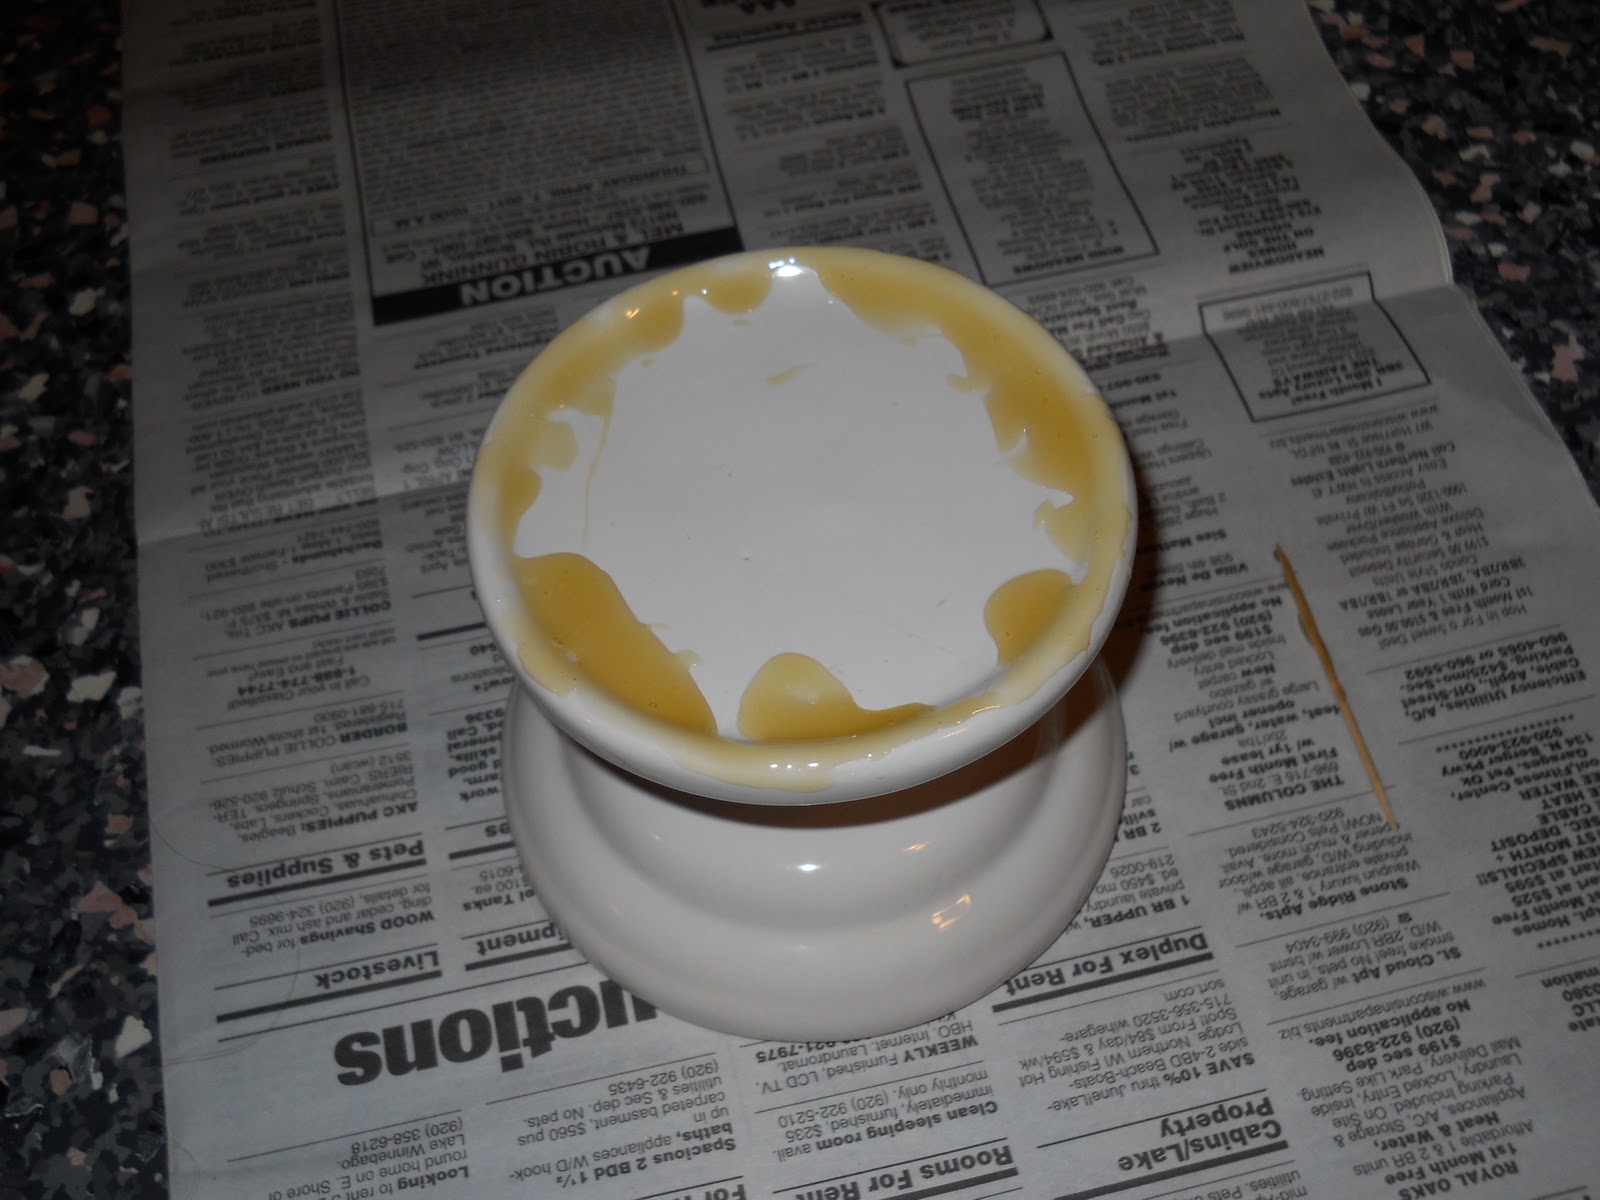
Once your plate and candle stick are clean the rest is easy peezy....I've seen this word on lots of blogs so I believe it is proper grammer :)  What I did was marked my plate with a sharpie on the top and bottom to make lining up the candle stick easy when I put the glue on. 


Then put the glue along the rim of the candle stick according to the directions.  I used a toothpick to push some more of the glue along the rim before attaching to the plate.

. 

Once you put it on the plate you need to clamp it..... or in my case add some heavy books to weight it own. 

I let it sit for about 24 hours and viola.... a new cake plate ready to hold yummies on it!!!  I think I will put the Banana Cake with Cream Cheese Frosting I made today on it for Life Groups tommorrow. :)  In honor of my 1st follower.....Peace Out Hommies :)


Monday, March 28, 2011

I'm Here

I have been wanting to do this for awhile....who knows maybe I'll be the only person reading my blog and that's okay.... I'm calling my blog creative commotion because to me that is how it seems.  I get these items and following through causes all kinds of commotion....which is a nice way of saying a mess :)  Some of them work and some don't!  But I keep creating because that is what God put in me!  I look forward to sharing some of my creative inspirations and knock off ideas from the incredibly creative people out in blog world!!!!

Blessings!!!
Linda