Tuesday, September 27, 2011

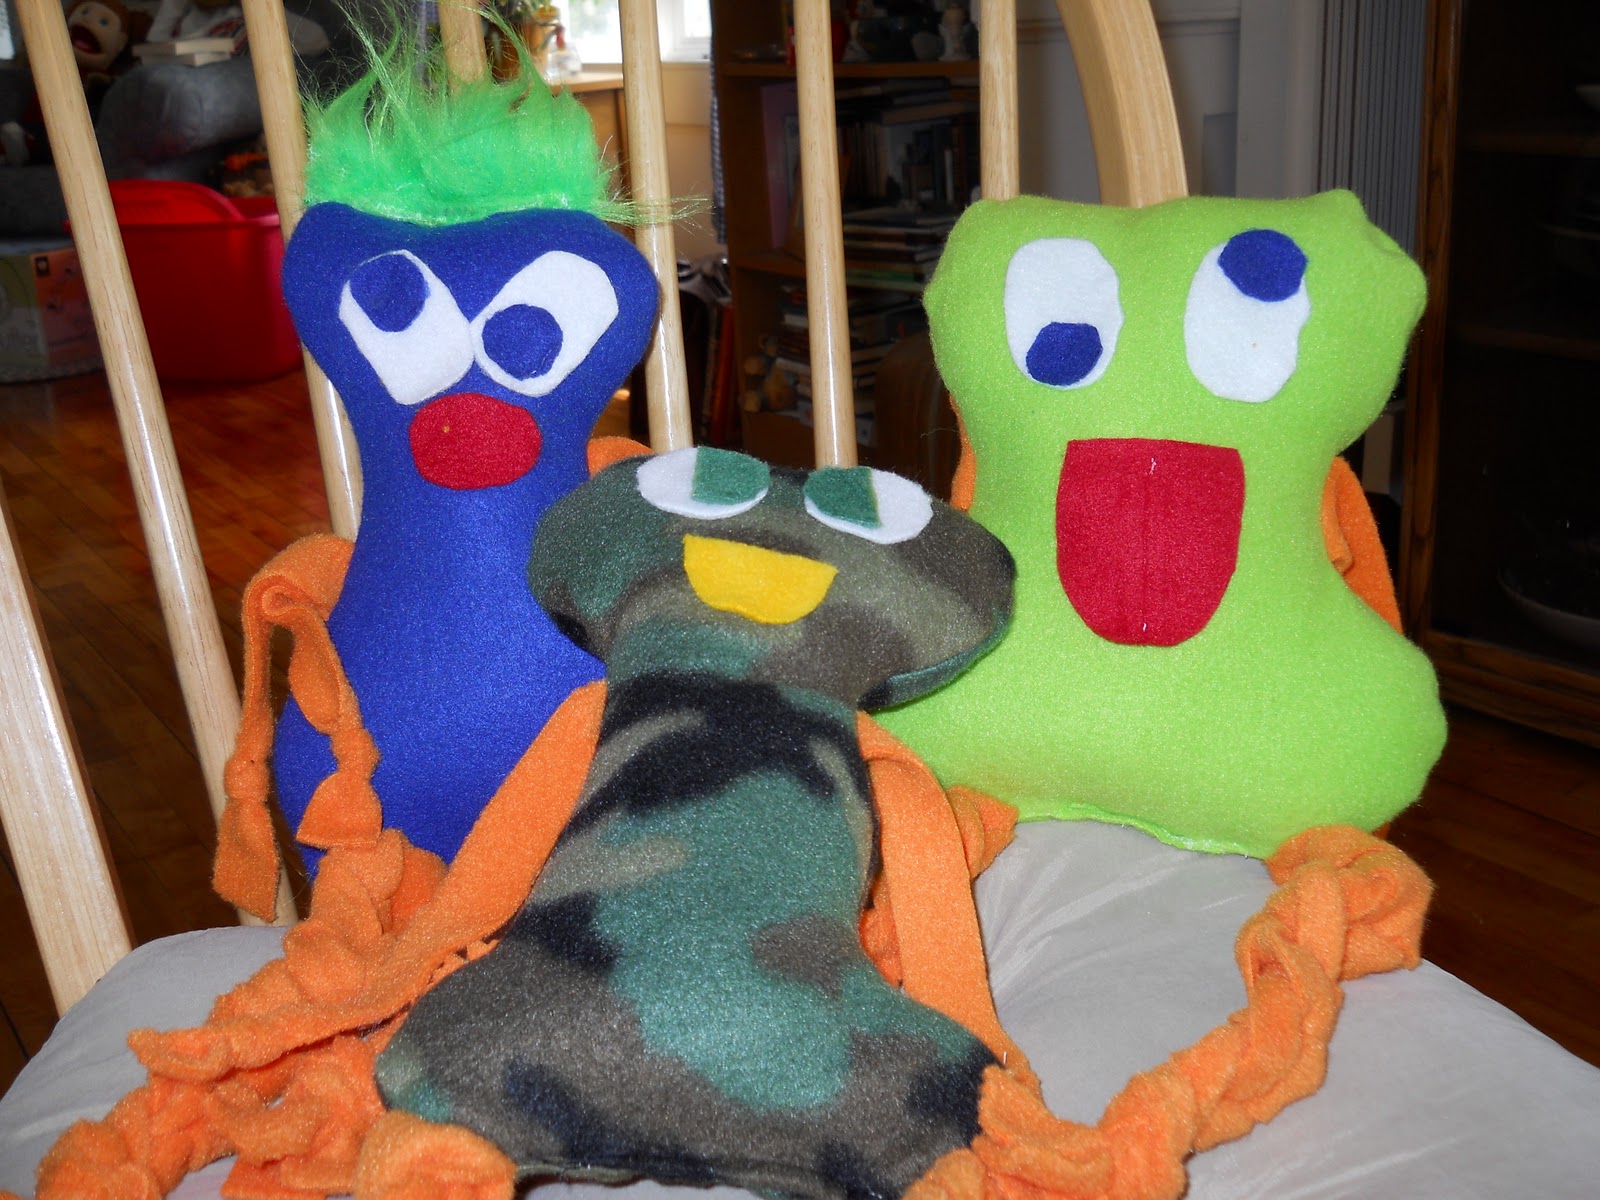
Fleece Buddies

Just wanted to take a moment to introduce you to some of my friends....
I call them fleece buddies :)
They are as you guessed made out of fleece. 
There is no pattern or right way to make them.... but here is how I did.....
fold your fleece in 1/2 and cut a random shape.
Make arms out of a coordinating color - for legs I took 3 strands and braided. Secure with knot.
pin right sides together and pin the legs and arms so they are on the inside of the fleece buddy.
Sew around your shape and leave opening to turn right side out.
Stuff with poly and sew up the openning.
Make fun crazy eyes out of more fleece and glue on with craft glue - (or sew on to one piece before you sew together.)
Make a fun mouth - the green one has a tongue that flaps (it is not all the way attached)
You can add fake fur for crazy hair or whatever else you can think of....
and you have a totally fun, original fleece buddy.
Makes a great kids gift...especially for a boy :)


Make sure you share with me if you try one.... I would love to see your handi-work!

Hugs,
Linda

Friday, September 16, 2011

Marriage......beginnings and the journey

Today (Friday) is a beautiful day.....

              Josh and Lindsey start their journey together in marriage.....

                        and Chuz and Joan celebrate 50 years of their journey!

Here is an excerpt from Joan's email.........

PLEASE DON'T RESPOND TO THIS E-MAIL.  WE ARE NOT SOLICITING A RESPONSE.  REPLIES WILL ONLY CONFUSE OUR POOR OLD COMPUTER.  WE ONLY WANT TO TELL THE WORLD THAT TODAY WE ARE MARRIED 50 YEARS.  WE JUST HAD TO SAY IT.  WOKE UP AND WENT OUTDOORS AND SHOUTED, " WE MADE IT!".   PERHAPS YOU HEARD IT.

Isn't that awesome!

What a wonderful accomplishment!  Way to go Chuz and Joan ~ We love and respect you both so much!

Congratulations Josh and Lindsey.........enjoy the journey :)

Here is a fun little gift I made for the new love birds...........


I found a really cute printable at http://www.eyechartmaker.com/  They let you type in your own text and arrange it like an eye chart.  I put in their names and the date and some xoxo :)  Printed it out on card stock and put it in a frame I spray painted a nice glossy black.  A totally original wedding gift to add in as a little extra.  I hope they like it :)


I just love a good love story :)

Have a blessed weekend!


Tuesday, September 13, 2011

This just in..... A Special Bulletin

So I was excited to pick up a really large bulletin board at the thrift store for $1.00.  I knew I could do somehting with it for that price I just needed some inspiration.  Well inspiration came when I found this blog and cute ideas....
Check out Corrie's cute bulletin boards!

So I grabbed some items I knew I needed and set off to work.


I spray painted the outside frame white.  Sorry forgot to take a before picture but I think everyone knows what a bulletin board looks like :)
I choose to cover mine with burlap.  Cut the burlap to the size of your board.
I sprayed with adhesive and attached the burlap.
I used some really cute ribbon to frame the inside of the board
and cover the ends of the burlap.  
 I used fabric glue for this.

Here is Ruth checking it out.  I got her approval to hang it on the wall upstairs in our guest/craft room.


Here is an extreme close-up of a corner as it is hanging on the wall in it's new home.
Isn't it cute! 
So much nicer than an ugly old bullentin board and so functional!

Let me know if you try your hand at one of these :)

Blessings!
Linda


Linking up at:

Thursday, September 8, 2011

Let Your Light Shine

This is a really cute luminary jar project I found courtesy of the brilliant ladies over at Idea Attic
They haven't posted for awhile but they still have some really cute ideas available.

All you need is:
a clear glass jar~ I recycled my Almond butter jars
(Almond butter is incredible if you've never had it!)
Frosted glass spray paint
star stickers - or whatever shape you want to shine through

Instructions:
Make sure your jars are clean (no label gunk)
place stickers randomly over jar
spray paint and let dry (I used at least 2 coats)
Once dry....peal off stickers.
Yes....it really is that easy!

Here is a before and after (and my basil in the background)

These will be really cute lining a walk way or hanging in a tree with wire around the mouth of the jar to hold them.  I wrapped twine and hand stamped some metal washers.
I am selling mine out at the Little Farmer in Malone, WI. if your in the area and are interested.


You can make so many cute things with items you would normally throw away.


Be blessed,
Linda

Linked up at:
http://jaimelyn11.blogspot.com/

Saturday, September 3, 2011

for the love of buttons......

 I have a confession.....

                 I need to come clean...........    
                                         
                               I can't stop myself.................

I LOVE BUTTONS!

and the worst part about it is I hate to use them because I think that is such a cool button....what if no one else appreciates it the way I do....what if there is a cooler way to use it....what if I need it for something else.... I know it's really ridiculous but I already told you I need to come clean! 

Really Linda....get a grip and let them go!  So as you can see I gave you a clue in the picture above of what I have been doing with some of my buttons. 

I saw a really cute button braclet in Door Cty this summer but the price tag was so not cute....almost $25....WHAT!  Come on that is a little over priced even for Door Cty which is like the Martha's Vineyard of the Midwest....at least that's what I have been told. 

So like any good crafter I said to my self..."Self...I can do that" so I did. and here it is.....


This is one craft that actually looks much better in person. 


It's very easy....so here are the steps:
cut a piece of elastic a little larger than your wrist.  I used 1" thick.  Sew the end over the end to make a circle.  Make sure this is very secure.  Begin to sew random buttons all over and layer them to your liking.  You can use whatever color combo you like.  Just be sure the buttons are securly fastened.  A little time consuming but very worth it.  This particular bracelet is available on whoopdwhoop.com.  If you sign up please use my link. (I would appreciate it!)  http://whoopdwhoop.com/register/index/r/1981

Have a great weekend...I'm off to a major painting project!  I'm exicted and can't wait to see what the rooms will look like with some color instead of white walls!

Hugs,
Linda

Monday, August 29, 2011

Dear Summer......

Dear Summer,

Just for the record I'm not ready for you to leave yet.  I love you and want you to stay as long as possible. Don't you see me out playing and walking and biking and planting and spray painting and  ......
I'm not enjoying the fact you seem to be turning off the lights earlier and earlier but I am willing to overlook this flaw if you will stay.  In order to show you I really to appreciate you I made Blueberry muffins tonight and added some rasberries for good measure.  See I am serious about you hanging around ~ these are good summer time fruits! 

Love,
Linda


P.S.  Just so you know I am really, really serious!!!   I didn't want to take the time to write down the recipe for people so I took a picture of it :)  See that leaves me more time to enjoy you summer!
(I added a heaping 1/2 cup of blueberries and threw in the rasberries....I did'nt measure)


P.P.S.
I also made a fruit pizza for the pot luck yesterday using summer time fruit!  Can't you see your breaking my heart summer when you threaten to leave!


Fruit pizza: sugar cookie crust (used a dry packaged sugar cookie mix and followed directions....baked on pizza stone.  Follow directions for cutout cookies....I didn't and mine spread really bad and over flowed on the bottom of the oven)
Once cool....mix package of cream cheesed (softened - I used low fat) and one tub of marshmellow fluff together....spread over cookie.  I let that sit on cookie for a little while (1/2 to 1 hour) then carefully removed cookie dough from pizza stone and slid on to serving plate. 
Cut up any fruit you want to use and decorate (I used red grapes, blueberries, strawberries, rasberries and kiwi) Very delish!


Sunday, August 28, 2011

Pie and Project

Sometimes my favorite crafts are little things :)  I went on a GW adventure and found a black iron wall hanging object....don't know if it qualifies as a scone.....wait that is a bakery item :)  Anyways I remember seeing a mason jar with sand and a candle and thought it was really simple and pretty.  So I went looking in the basement and found the above items and I hung it on my garage/shed and really like the way it looked.  I want to make a burlap banner and hang "Welcome" across the top.....So I will see if I get it done and if it looks like I envision it in my head :)


I think it is weloming......husband said I'm going to burn down the garage but the flame is inside the jar so we are good :)


Also, my husband is rather hard to buy gifts for.  Not because he's picky but because he truly doesn't want anything.  So I gave him a "pie coupon" and he used it this weekend.  My parents brought me some door county cherries a few weeks ago and I made them into homemade pie filling......VERY easy and so delicious! 

This is not something I would take to a potluck because it is rather messing looking. 


It's graham cracker crust, layer of cherries, layer of lemon goodness (lemon pudding, cream cheese, cool whip) and layer of cool whip and more cherries.  "Fluffy Lemon Fruit Pie" ~ The family really liked it.  Mine doesn't look the picture in the book but it was fabulous tasting!  I go for taste over presentation on this one :)
too perfect who would want to eat that?!!!
Look below....Now that is a piece of pie :)

And one more picture from the weekend.....

enjoying a bike trail :) 
Food ~ Family ~ Biking ~ Crafting ~ Church
all in one weekend is pretty sweet to me :) 
Hugs,
Linda