Tuesday, December 27, 2011

These are a few of my favorite things :)

It's hard to believe that Christmas day has come and gone!  The busy, crazy and almost out of control preparations are done!  What didn't get finished didn't ruin the day!  I am sorry if you didn't get a Christmas card from me.  I am sorry I didn't have a chance to call or visit everyone I wanted to.  We barely got the tree up and decorated before Christmas...really :)  I didn't get to decorate outside like I wanted to.  I never hung the icicle lights on the deck...bummer....they are so pretty and I enjoy looking at them!!! 
With all of that said...I do plan on enjoying the tree for a few weeks.  I love looking at the ornaments and I thought I would share some of my favorites with you...

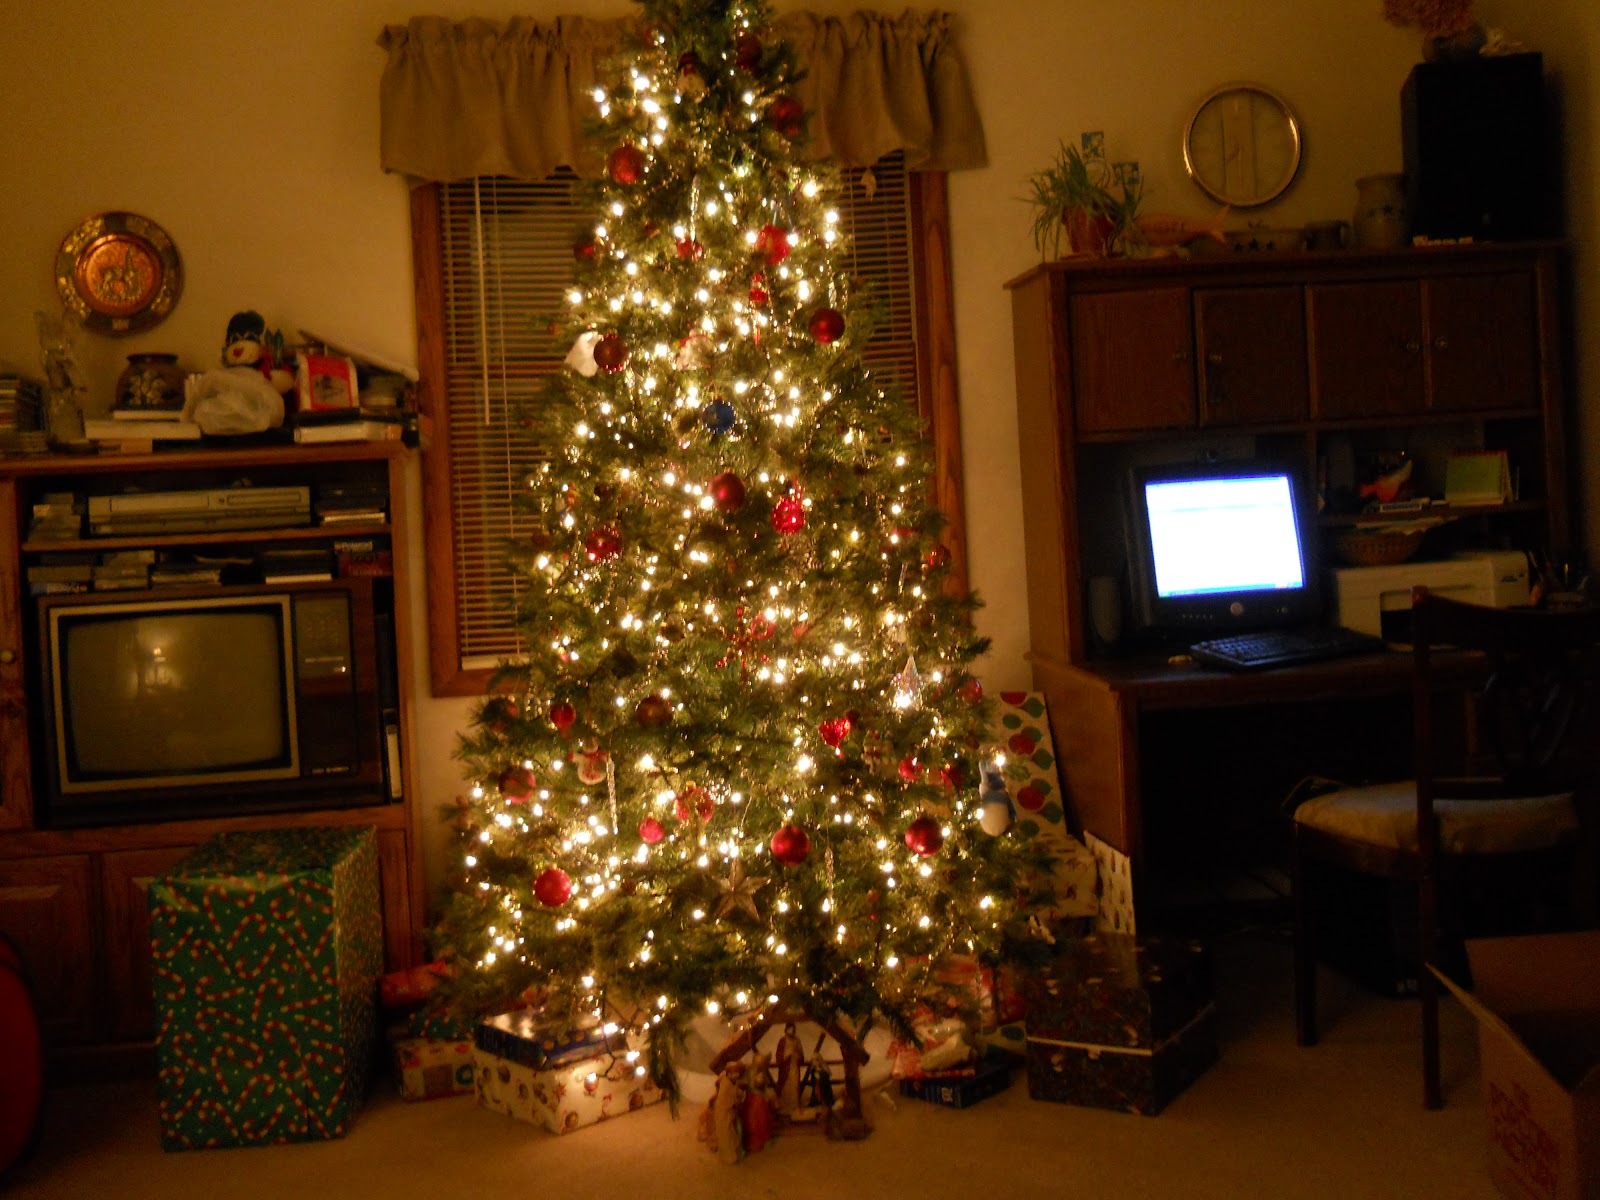
Here is the tree in our living room.....

I love the stars that shimmer...remind me of the star lighting that first Christmas night.....

My sock monkey ornament from my wonderful husband :)

Another fun monkey he got me last year....In case you missed it... I like monkeys :)

And a curious George on a bike!  Biking is another one of my favorite things :)

These guys make me smile everytime I see them.  Its a snowman surrounded by snowman heads :)

And my favorite part of the tree.  This is my favorite Christmas tradition since I was litte.  We always but the manger under the tree.  Keeps the focus on Jesus!!!  He was, is and will always be the greatest gift I have ever received!!!!
"Thanks be to God for his indescribable gift!" 2 Corinthians 9:15

~ May your new year be filled with Jesus ~

Blessings,
Linda


Thursday, December 22, 2011

We wish you a Merry Christmas and a Happy Root Beer!

I love these little guys!  I have seen them out in blogland and just had to make them. 
junkintheirtrunk.blogspot.com has a great printable.  I put the link below.
She has the instructions and some other really cute projects!


I found my pom pom's at JoAnn's and had the other supplies on hand


I gave these out as gifts for co-workers.  I have some other ideas too....

Isn't he cute!!!!!

Make some deer and spread some cheer! :)

Blessings,
Linda :)

Sunday, December 18, 2011

super easy appitizer ~ Tortilla Roll Ups

This is a very easy and delicious appitizer!  It has always been a hit for me. 
 I don't have a recipe per say but this is generally what I do:

1- 8oz. cream cheese softened (I use low fat)
sour cream - almost a full container....the amount I use depends on how much is needed to get to a nice spreading consistency
1 package of Hidden Valley Ranch dressing (dry pack)
Mix together and add veggies...whatever you would like
I use my Black & Decker food chopper to get the veggies nice and small.
I usually use broccoli, cauliflower and carrots.  (green onions are always good too but mushrooms and/or black olives would ruin them!  Really!!!  Okay not really I just don't like them!!! )
Add shredded cheese....Us WI. people like our cheese.  I use almost 2 cups.
Again mix everything together and add a little more sour cream if needed to make nice and spreadable.  I have also added extra ranch dressing if I added lots of veggies.
Spread on your tortillas.  I roll up and put in the fridge overnight or for a few hours
Take them out of the fridge and slice up. 

Place on a platter and you have a wonderful appitizer.

 You can place the ends in a seperate container for the hubby so he doesn't feel slighted!!!! :)

Enjoy!!!

Linda :)

linking up at:
http://www.thegirlcreative.com/

Wednesday, December 14, 2011

Fruit Cake ~ The best recipe you will ever have!


Fruit Cake is one of those things that makes people gag or laugh about.  My husband used to give one to his grandma every year because he thought she liked it but later found out she was just being polite.  Either that or needed door stops or draft dodgers.  Now I never understood this because I have a totally different idea of what fruit cake is.  I never had a nasty store bought one as a child.  When I was growing up in Westport, WI. (a little township on the outskirts of Madison) - the church I grew up in, St. Mary’s of the Lake, used to make fruit cake as a fund raiser for the church during the Christmas season. It became so well known for being moist and delicious, and so different from store bought fruitcake, that they sold it not only in our community, but did a mail order business around the nation and even overseas. It was always looked forward to as a special treat at Christmas time. My mom saw this recipe years ago in a Better Homes and Garden magazine and said it is the closest thing she has ever seen to the church recipe and my dad agrees as it is one of his favorites too. : )This has totally changed peoples perception of what fruit cake is!  It is time consuming but I am telling you it is so worth it!!!!  My mom still makes it every year :)  Thanks mom!!!

Brazilian Nut Date Cake

In a large bowl mix together:
1 1/2 cups whole brazil nuts
1 cup pecan halves
16 oz. pitted dates
1 1/2 cups maraschino cherries (drained well)
In another bowl thoroughly mix together:
3/4 cup flour
3/4 cup sugar
1/2 tsp. baking powder
pinch of salt
In third bowl beat together until foamy:
3 eggs
1 tsp. vanilla
Blend egg mixture into flour mixture.
Pour this over the nut mixture and stir well.
Pour into a 9 x 5 greased and paper lined loaf pan. (My mom uses wax paper and greases that.) Bake at 300 degrees for approx. 1 1/2 hours to 1 hour and 40 minutes. Check for doneness with a toothpick. When done, cool in pan for 10 minutes and then remove from pan. Cool loaf completely and then wrap in cheese cloth and foil. (My mom just wraps in 2 layers of foil so it does not dry out). Store in cool place. Flavor is at its best if you let it sit for at least 1 - 2 days before eating.

I'm telling you it is soooooo good - I am craving it now! I don't have a picture but this looks close.....you only need a small piece because it is very rich and delish!

Have a Blessed Christmas season.
Linda :)


Linking up at:
http://www.niftythriftythings.com/category/nifty-thrifty-sunday
http://www.thegirlcreative.com/

Monday, December 12, 2011

Christmas Stockings

Did you ever notice all the different styles, sizes, colors, etc.. of Christmas stockings. 
As a kid I loved running to my stocking and discovering all the goodies inside :)  The fun little trinkets were as much fun to open as the big things under the tree.

I think we adults, especially DIY's love the creativeness of the stocking.  Matching decor or expressing our taste or creativity.  I made some stockings and thought I would share them with you.....
The first one is a little hard to see but it is a black stocking with a stained glass type of fabric cuff.

Here is the cuff close up..... I love the different colors.....

And of course you have to have a traditional Christmas stocking made out of red, green and black tartan.

The cream stocking is my favorite.... I love the material....I don't know what it is but it looks like coconut to me :)  I used a fuzzy warm fleece for the cuff and a fun ribbon to decorate the edge. 

 The gold reminds me of the golden star that lead the wise men to the baby Jesus.  
I just really like the uniqueness of this one.


The first two are available on whoopdwhoop.com for 5 whoops each.  If your not familiar with whoopdwhoop it is a website you can trade your crafts with other crafters ~ no money is used. Check it out, I have gotten some cute things :)

Enjoy hanging your stockings!!!
Merry CHRISTmas!!!!

Blessings,
Linda

linking up at:

Saturday, December 10, 2011

Oh Christmas Tree

I wanted to share a Christmas Tree wall hanging I made.  It was not 
difficult to make and you could totally modify to fit your taste, decor, etc....
I choose a simple backing (cream with a flower design...looks a little like snowflakes in the background)
I then cut a triangle out of green material.  I cut the triangle into 3 pieces.  I cut a piece of brown material to be the stem of the tree and sewed on using a zig zag stitch.  I then sewed the green pieces onto the background (also using zig zag).  
I love buttons so I used these as decorations on the tree.
I sewed a boarder on and added the loops to make it into a wall hanging.

I used a tree branch to be my hanger and added buttons to the corners to complete the look 

I like the simplicity of it. 

Let me know what you think :)

Blessings,
Linda :)

Linking up at:

Tuesday, December 6, 2011

Happy Birthday to the Mel!

Our Mel turned 22 a week ago!  Yipee :) 
We were able to celebrate her birthday Thanksgiving weekend when she was home on break.

 To celebrate such a grand occasion she let me surprise her with the type of cake.  All she said was chocolate had to be involved some how.  So I made a yellow cake with no cook fudge frosting (recipe in the Betty Crocker cookbook ~ this was some good frosting!!!!) and did a middle layer of raspberry on top of the chocolate!  I used simply fruit and spread on top of the layer of chocolate frosting and then added frozen raspberries that I had thawed and spread those on the layer of simply fruit.   I frosted the remainder of the cake and used white chocolate chips to garnish.  Turned out delish!!!!

Happy Birthday Mel!  We love you <3!!!!!!
*****************************************************************

Thursday, December 1, 2011

HELP ~ Christmas Center Pieces

I would like to come up with some easy, inexpensive center pieces for our Christmas I mean Holiday party at work.  I hate "political correctness" but don't get me started.... Okay so I need some CHRISTMAS ideas for tables :)

If you read this and have an idea I would appreciate your link or comment :)

On my checking out the Web here is some ideas that I found that are

 I love the simplicity of the bottom right corner!

 I am totally loving again the bottom right corner!!!!  Incredible!!!!
The red and white is so fun and cheery also!
 
I don't think any of these will work for me though!  I need something for about 14  round tables.

Better Homes and Gardens had some great ideas also
What about each table having just a nice wrapped present?  too goofy?  cheap?????
I loved these stacked presents!!!!
 How about a simple glass with candle and filled with some red and white peppermint candies....that is simple and pretty?

Here is another link with some great ideas:

 I love the ornaments on candle holders....so cleaver!!!!

Even having ornaments in a glass bowl is nice idea....but I don't have that many bowls!
So are you ready to share your ideas or are you going to use something for yourself that you found here?

Any and all ideas, comments, suggestions are welcome!!!

Blessings,
Linda


Sunday, November 27, 2011

Jute Wrapped Orbs :)

Well if you saw my post last week of my buffet you may have noticed a bowl with jute wrapped balls.  You can click here if you missed it....http://creativecommotion.blogspot.com/2011/11/my-new-buffet.html
I thought I would share the super easy project with you.....

Supplies:
*Craft balls in whatever size you want.  I found a bag at a thrift store for $1.29 (good price!)
I liked that mine were different sizes but you can do whatever size you want.  The bag I bought says Polystrene holds better than styrofoam.  I liked that they did not melt when I used the hot glue on them.  But I think you could use styrofoam also.
*some jute string - I usually buy mine at Menards or Wal-Mart
*and a glue gun

Add a drop of glue at the top and attach your string.  Wait until dries enought that it will stay attached.  Just start wrapping your string and add glue as you go.  Some areas need more glue and others less.  If the string moves a lot just use glue.  I found it was easier to wrap the top side compared to the underside.  Could wrap half and then flip and wrap the other half if easier on you.


Finished product
I like the natural look they create :)

Blessings,
Linda

Friday, November 25, 2011

2 Ingredient Pumpkin Muffins

These are soooooo easy and turn out really good!  I first saw them listed here....
go check out Reannah's blog.  She has some really cute projects too :)

Okay .... so here are my ingredients....
Yellow cake mix
Pumpkin puree - 15 oz.
** I added chocolate chips too...a mixture of dark chocolate and semi sweet **
Mix together and put in lined muffin tins.
Bake at 350 for 25 min - (until toothpick comes out clean)

ta da :)

** this is the second time I have made these.  The first time I used a white cake mix because I didn't think I had a yellow mix (of course I found one after they were made!).  Yellow is definately the way to go!! **

Go ahead and whip up a batch for breakfast..... your family will thank you and will never know they were the easiest muffins you ever made :)

Blessings,
Linda

Thursday, November 24, 2011

Chair Re-Do for Craft Room

~ Hope all of you had a great Thanksgiving with family and/or friends!  We have so much to thank God for!  I am thankful for creativity and all the fun things the Lord helps me create.  So on that note I thought I would share one of my latest projects with you :) ~

I love bold and fun colors.  I wanted to use some of these types of colors in my "craft room" - aka...guest room.  I have been working on this room for a while now and I am not making much progress!  Time seems to be the biggest road block.  However, I did manage to redo a chair for my desk recently.  I had found this chair for $2.00 at the Restore store.  After sitting for a 3 months or so I thought today is the day!!!!!


I started with nothing too exciting...very drab and boring actually!
I wanted to paint her green but decieded on white instead and redid the seat in a fun green.
First thing I did was wiped her down good (dusty and grimy)
I removed the seat and then put a coat of primer on it.  The cane is a litte more time consuming to paint.
I then put 2 coats of white (I used left over Picket Fence White - the color I used in my dining/piano room - in the background)
And here she is finished with the new seat. 


And here is a close up on the seat.  Don't you love the pop of color!  I used a remnant I found at Joann's

It always amazes me what you can do with a little paint and some fabric!!!
I always think...what's the worse that can happen with this?  I don't like it and repaint, or refabric or give it away!  But right now this chair is bringing a smile to my face everytime I see it!!!!

Have a blessed weekend!!!!

Linda :)

Tuesday, November 22, 2011

My New Buffet!

I'm super excited!!!!  And it is just in time for Thanksgiving!  Since repainting our piano/dining room I have been on the look out for a buffet that wasn't going to break the bank!  I had been looking periodically on Craigslist to see if I could find a piece.  I saw one but I wasn't all that excited about it.  I went back and looked at it a day or two later and thought well it might work...It was starting to grow on me so I prayed about it.  I contacted the seller and asked if I could come see it....(I did show my husband first and got his opinion too - he wasn't crazy about it but said if I liked it I could get it - he liked it better in person too - just not as much as I did!!!)  Well to make a long story short....when I saw it in person I LOVED IT!!!!!  It totally fits with the cottage feel I was going for.  Not only that it totally matches the new paint job...the buffet is a tan that fits in perfectly with the walls!!!  So without further ado here is my latest blessing from Jesus!

It's just the right size for that spot and look at how the color matches!!!! Did I mention that I'm super excited!!!!

 Top and bottom close ups.....Lot's of storage space for my "special" bowls, cake plates, etc....


Did you see my cute new clock in the first picture! (from Hobby Lobby - 1/2 price sale)
 I am so loving it too....here is a close up....

I am really happy with how this room is coming together!  I need some drapes and a new dining room table but I'm good for now!
Thank you Lord for the new blessings!!!!!!

Linda :)

Friday, November 18, 2011

A Quick and Easy Dinner

I know we are all busy....like super busy and if your like me your always looking for quick and easy dinners.

Here is a fast way to do Scalloped Potatoes and Ham (Turkey Ham that is :) )

All you need is 2 boxes of quick scalloped potato's...as you can see I used Hungry Jack and I used 2 different types.  Follow the instructions on the box and mix in your ham

Here it is all mixed up and ready to go in the oven

And 30 minutes later you have a yummy meal.  Just add a veggie and some biscuits and no one will know you took a short cut using boxed potatoes

Enjoy!!!

Tuesday, November 8, 2011

Custom Wall Art

Our house is old....like 100 years old.  There are many things wrong with our house like slanted floors... 
 but it is our home and it was a blessing from God and I love it!
With that said I have been wanting to do some projects for a while.  Well Labor day weekend I decieded to tackle our piano/dining room by painting and applying board and batten.  I am so exited with how it turned out!!!!  It is still a work in progress but I plan on sharing some of my projects in the next few weeks. :) 

Here is a view  with the customized artwork I made. 
(Don't you love how the cross ties in too!  Hobby Lobby - Clearance $5.50! ~ score!!!!)
So here is how you can customize some artwork for your walls on the cheap!
I bought 4 pictures that already had the wire detail on them at the dollar store.  I could have just gotten a piece of wood but this way they were already cut so that worked for me.
I then went to JoAnn's and found some scrapbook paper I liked and would match my new walls.
I painted the sides and a small part of the top of the boards brown.
I then used modge podge to attach the scrap book paper onto the boards.  I let it dry overnight and the next night I modge podged the front.  Make sure the paper is tightly glued to the board or you could have bubbles.  Thankfully I only had a few bubbles and they were not very noticeable. 
Here is a close up....the wall looks greenish... but it is a tan!  I think they look better in real life then blog land :)!!!!  I attached picture hooks to the back using gorillia glue and I had art that fits my new room.

A little imagination can go a long way!  Don't be afraid to create something for your house...you can always change it if you don't like it!
This project only cost....
$1.00 per board - used 4
paper...less than a dollar per sheet
hooks around $1.00 for a pack
so for under $10.00 I dressed up my wall and am really happy with the results :)

Blessings!
Linda

Sunday, November 6, 2011

Mini Apple Pie Cups

Fall + apples = delish!


My parents came through town and brought me a bag of apples my dad picked.  So I had to make something good :)  I found a recipe to try at http://asimplyklassichome.blogspot.com/2011/10/31-days-of-simply-homemade-day-29-mini.html  You can find the recipe at her link.

I didn't have any apple juice but I had cranberry so I used that.  Since I was using cranberry juice I added craisins to the apple mixture.  I tripled the recipe for our Life Group tonight and used 2 cups brown sugar total.    I also used 3 tubes of biscuits for a total of 30 pie cups.  I also drizzled with a powder sugar frosting just to dress them up a bit.  They were a thumbs up and I will definately make these again.

I know you want one!!!!

Enjoy!!!!